Prep time
12 h.
Cooking time
1 h.
Serves
2
Cuisine
Ukrainian
Difficulty
Categories
Don't want to retype the link? Scan the QR code with your camera and you'll land on this page!
On iOS, you can use the built-in camera; on Android, you need to download a QR code scanning app.
About this recipe
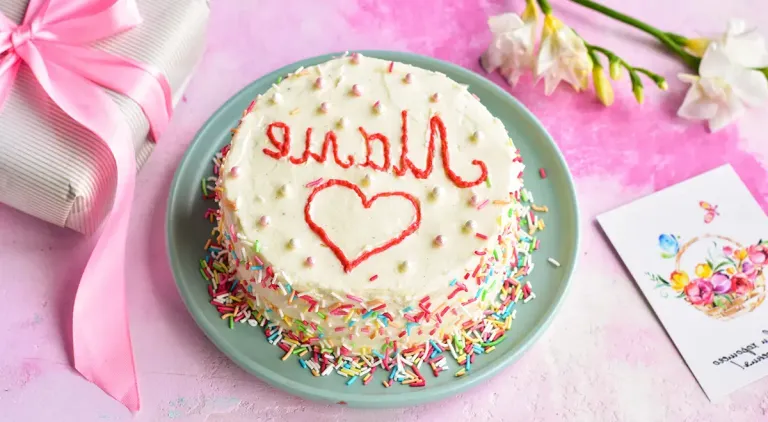
Immerse yourself in the world of small wonders with our simple bento cake recipe! This miniature dessert, decorated with creamy decor and fun inscriptions, will be the perfect way to express your feelings and delight loved ones. Forget about big cakes and complicated preparations - bento cake is simple, fashionable and incredibly delicious! Let's turn an ordinary cake into a work of art!
Ingredients list
Total ingredients: 20
Serves:
Wheat flour - 40 g
Sugar - 40 g
Chicken egg - 1 pcs.
vanilla sugar - 10 g
Salt - 1 pinch
Milk - 50 g
cocoa powder - 1 tsp.
food coloring - to taste
For sauce:
Raspberries - 100 g
Sugar - 20 g
Corn starch - 1 tsp.
Cottage cheese - 140 g
Cream 9% - 35 g
Powdered sugar - 30 g
vanilla sugar - 10 g
Boiled condensed milk - 1 tbsp.
Cottage cheese - 200 g
Butter - 50 g
Powdered sugar - 50 g
vanilla sugar - 10 g
Nutrition facts
Serves:
🥓
Fat
119г
🍚
Carbohydrates
235г
🥩
Proteins
36г
🔥
Kcal
Daily values
Preparation steps
Step 1
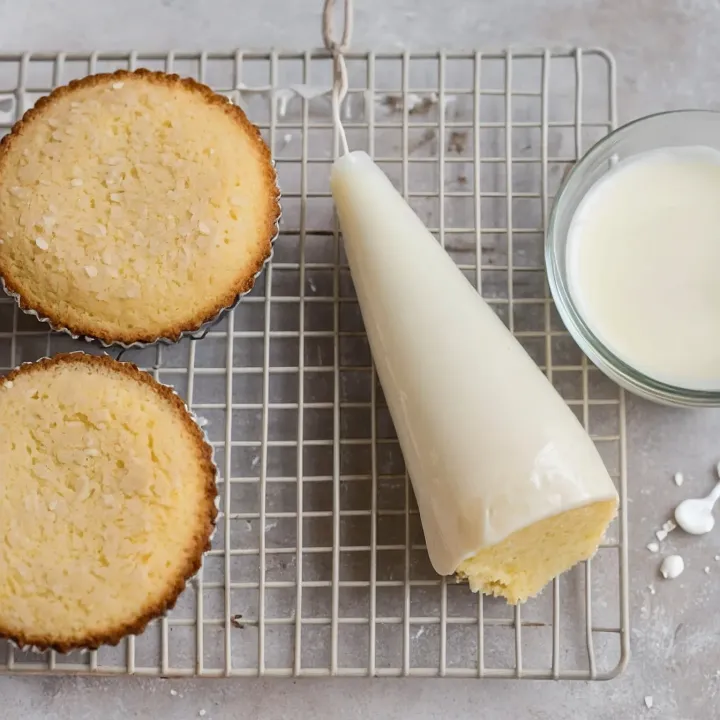
Prepare the soaking syrup: mix milk and condensed milk. Cut the sponge cake into two layers.
Step 2
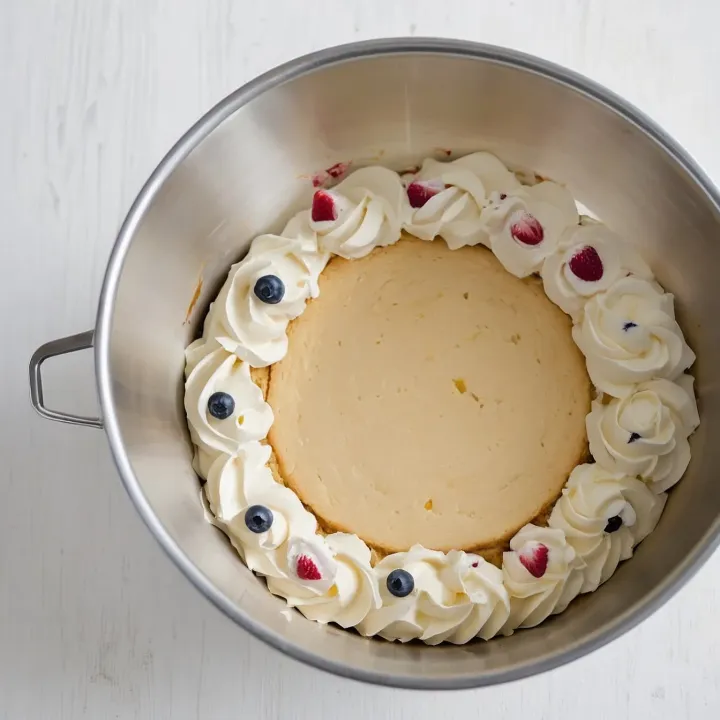
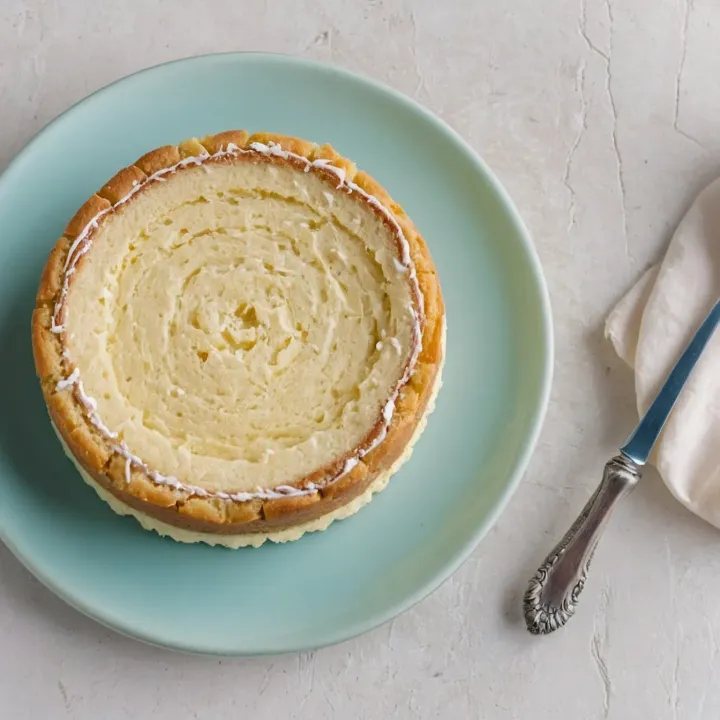
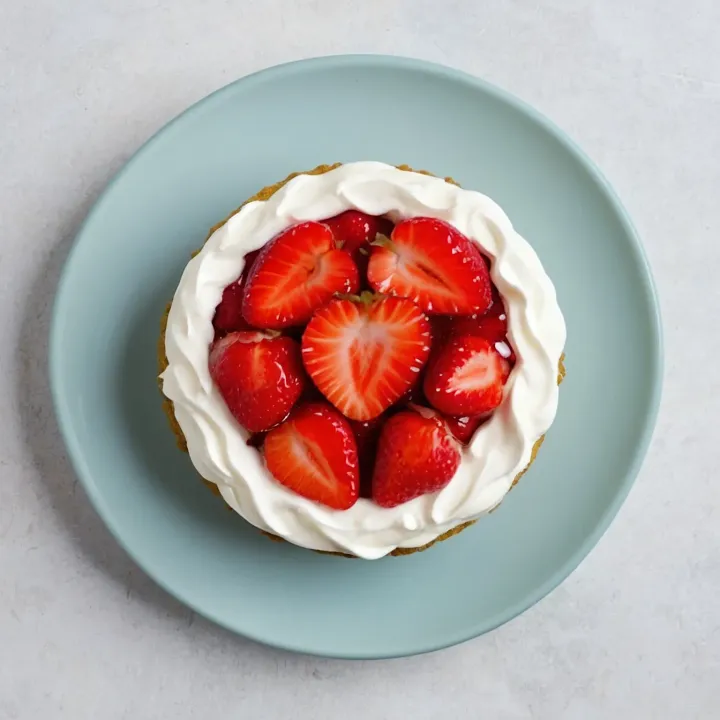
Assemble the cake: soak the cake layers and generously spread with cream, don't forget to create a "border" for the filling. Distribute the berry filling between the layers so that every piece of cake is filled with the taste of summer.
Step 3
Wrap the cake in plastic wrap and refrigerate for 8 hours (or at least 4) so that the flavors meld and the cake becomes incredibly tender.
For sauce:
Step 1
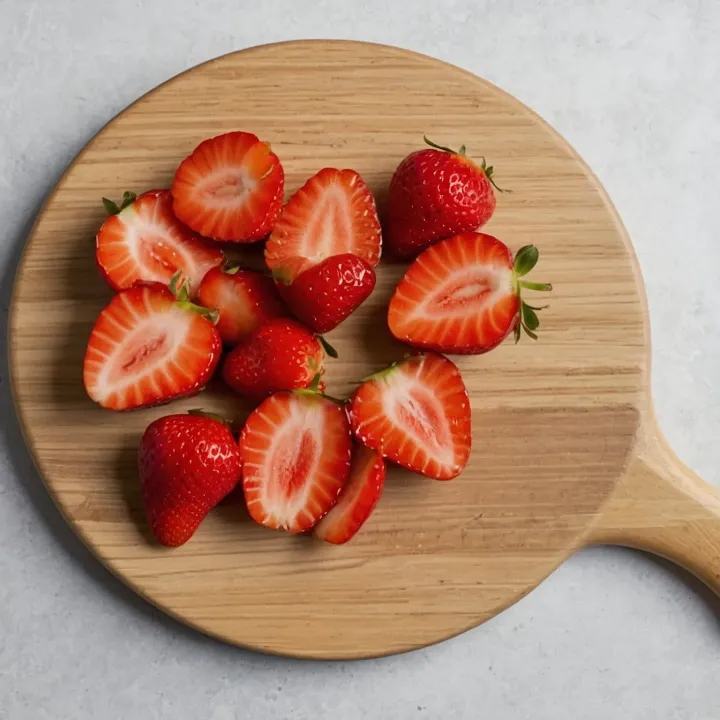
Start creating magic by starting with the filling! Gently wash the raspberries under running water, and if using frozen berries, let them thaw slightly. Turn large strawberries into appetizing pieces so that every piece of the cake bursts with the taste of fresh berries.
Step 2
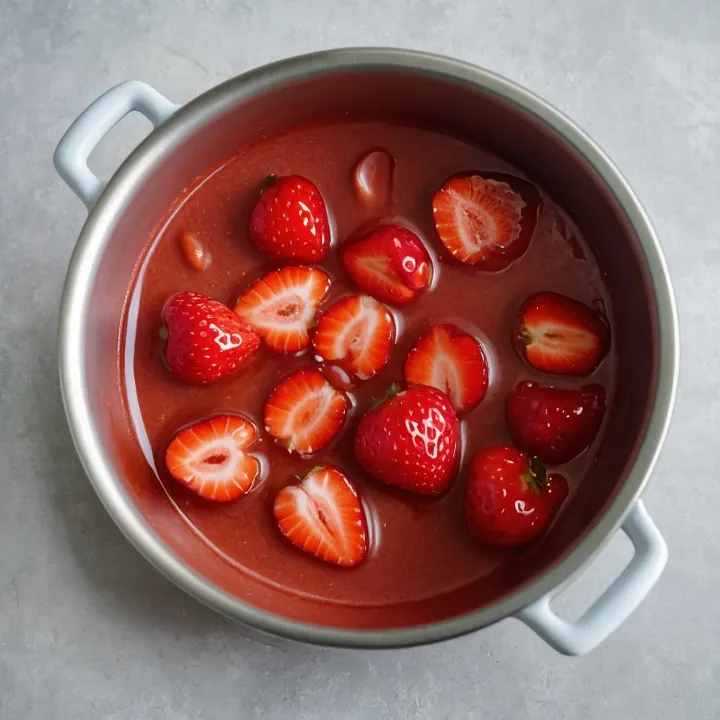
In a saucepan, combine the berry splendor with sugar and cornstarch. Over medium heat, stirring, bring the mixture to a boil. After simmering for a minute, when the filling has slightly thickened, remove from heat and cool it under plastic wrap to preserve all the freshness of the taste. Chill.
Step 3
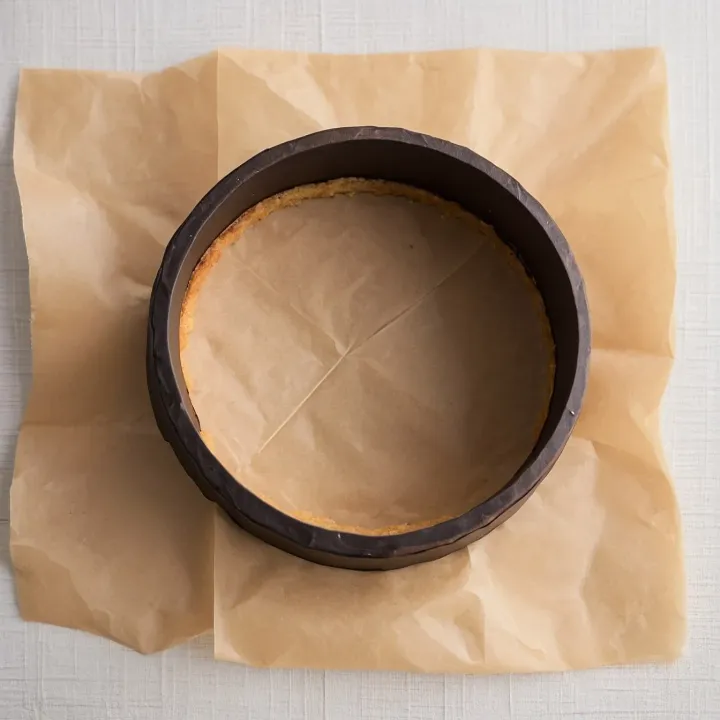
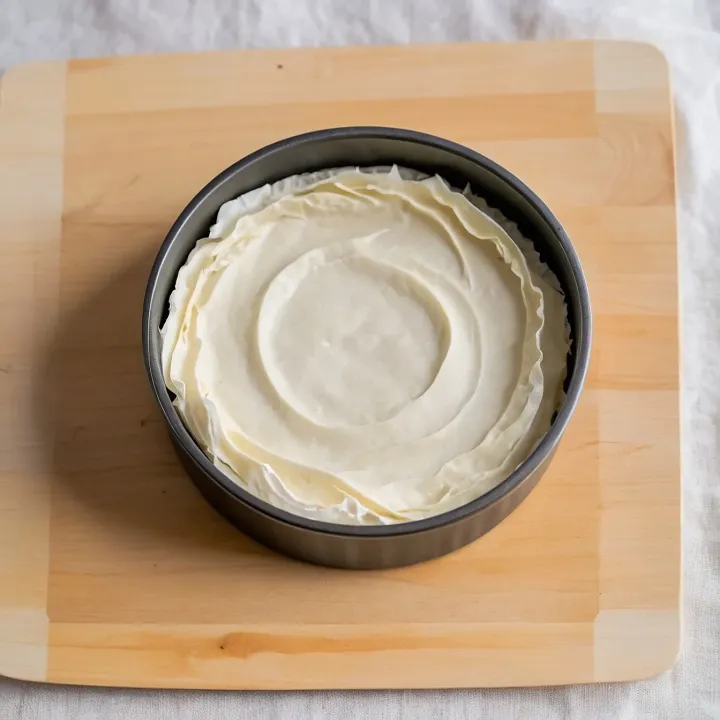
Preheat the oven to 180ºC. Prepare a 12 cm diameter mold or culinary ring, placing baking paper on the bottom. Create a stable base for your sponge cake so that it has the perfect shape.
Step 4
Whisk the egg with sugar and vanilla sugar until a fluffy, light mass that has increased in volume is achieved. In a separate bowl, sift the flour and add salt, then gently combine with the egg mixture to keep the dough airy and tender.
Step 5
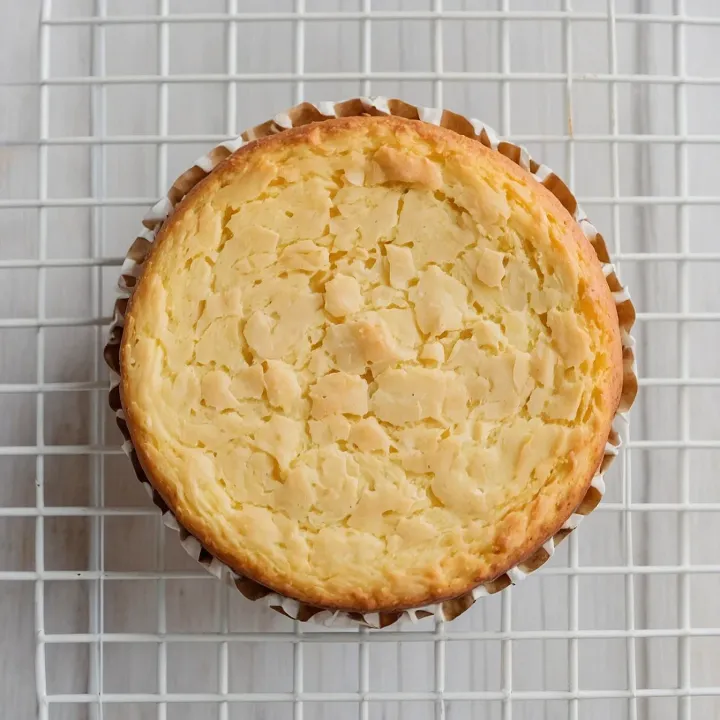
Pour the airy batter into the prepared pan and bake for about 20 minutes, or until a toothpick comes out clean. Remember, patience is key to success, so avoid opening the oven for the first 15 minutes.
Step 6
After baking, let the sponge cake cool slightly in the pan, then gently remove it and cool completely on a wire rack. Wrap in plastic wrap and let it rest for 8 hours so that the sponge cake structure becomes ideal for further work.
Step 7
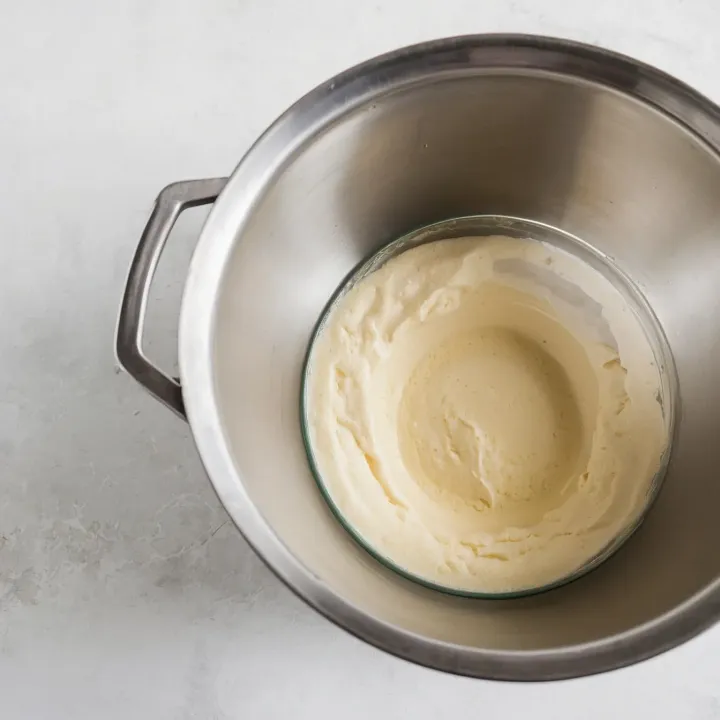
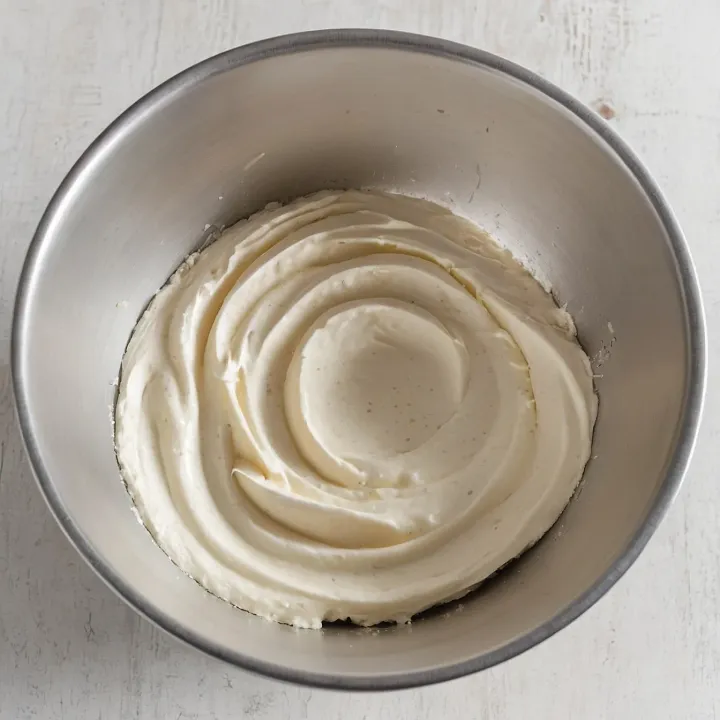
For the inner cream, whip cold cream cheese and cream with powdered sugar and vanilla sugar until fluffy. It is important not to over-whip so that the cream retains its delicate texture.
Step 8
For the final touch, whip the softened butter with powdered sugar and vanilla sugar, then add the cold cream cheese. Beat until smooth and transfer part of the cream to a separate piping bag for decoration.
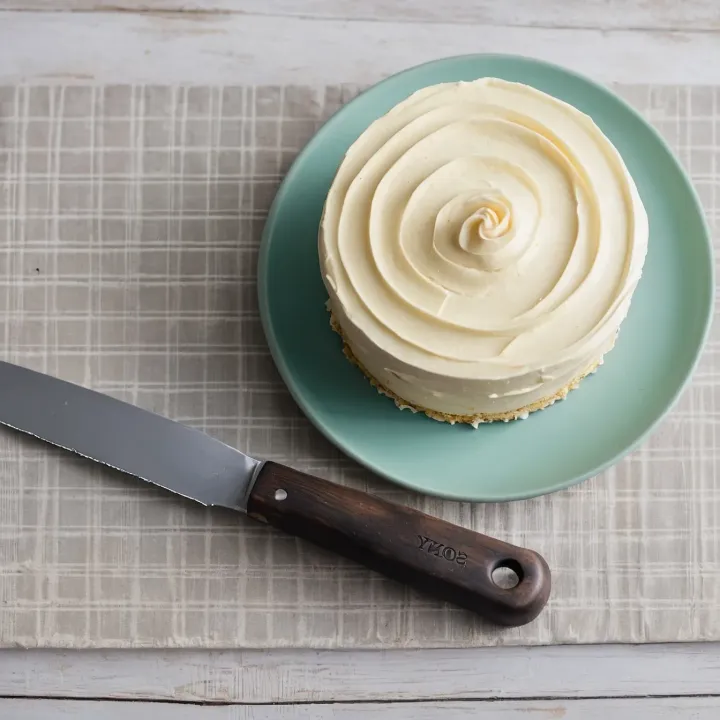
Step 9
Cover the chilled cake with cream and smooth the surface with a spatula. This step requires patience and accuracy, but the result is worth your effort.
Step 10
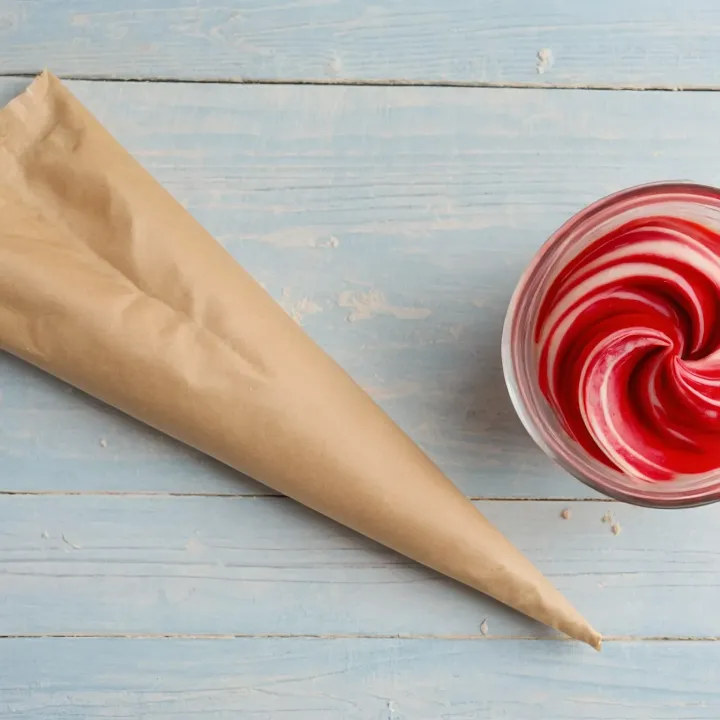
Add food coloring or cocoa powder to the remaining cream to create a unique color for your decoration. Transfer to a pastry bag with a thin cut.
Step 11
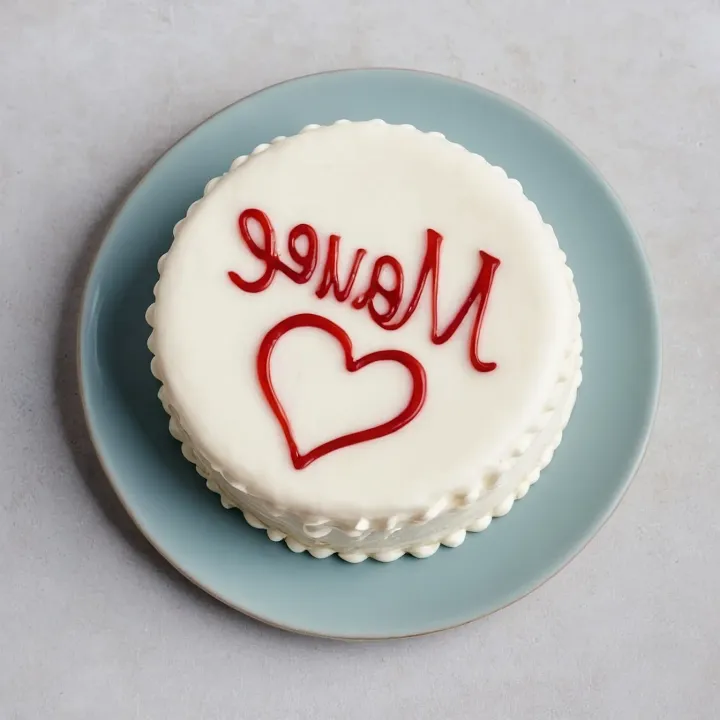
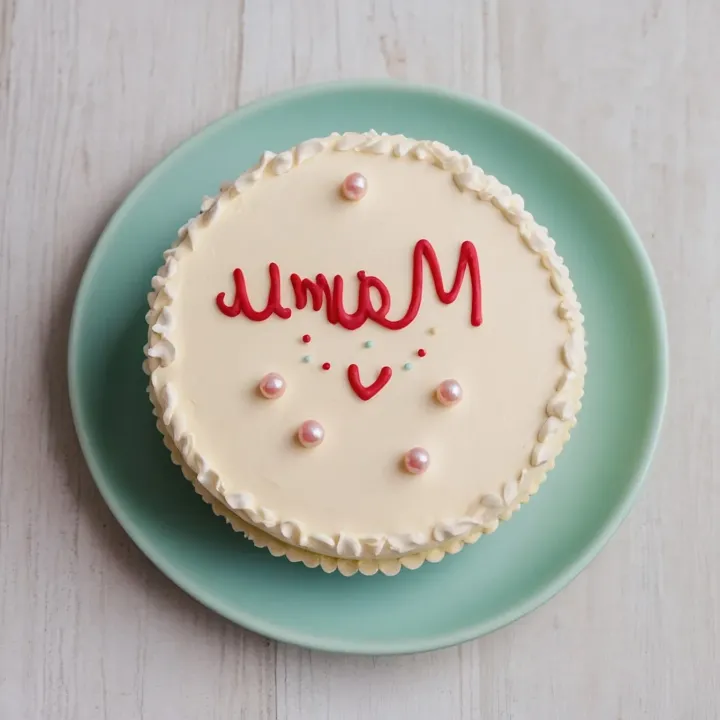
Apply a message or drawing to the cake, using a toothpick for preliminary marking. Unleash your imagination and create a unique message of love and joy!
Step 12
Outline the contours of your drawing or inscription with a double layer of colored cream to add volume and expressiveness. Remember, imperfection adds charm, so don't be afraid to experiment!
Enjoy your meal!
Follow the instructions step by step